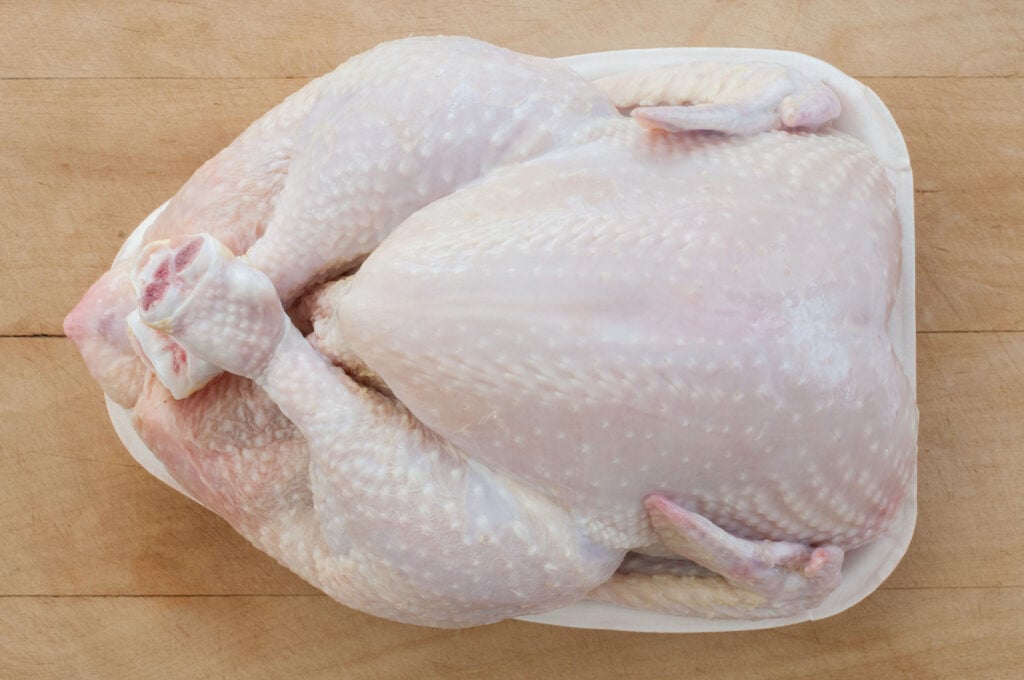
One of the more intensive tasks of butchering and dressing a meat chicken is the de-feathering or the plucking part.
如何defeather鸡肉在很大程度上取决于卫生大会t you intend to use the chicken for when fully dressed.
Will you use the meat as a whole fryer? A roaster? Just for the breasts or wings?
知道你想利用鸡更加积极re processing will help you decide how you’d like to remove the feathers.
There are three ways you can go about removing the feathers from a chicken after it has been dispatched.
In this article, we’ll cover each of them in-depth.
But before we get into the different ways to remove the feathers, we will take a brief overview of a feather.
Why?
Because it’s also important to understand thedifferent kinds of feathersand the anatomy of a chicken feather so you know how to handle each as you encounter them during the plucking process.
How to Defeather a Chicken: Know the Different Kinds of Feathers First!
A feather isn’t just a feather, especially when it comes to butchering chickens.
Some feathers are large, some are wispy, some are new, and some are old.
And all of these variations make defeathering more than just a simple one-and-done process.
Some feathers are easily removed, and others are a bit more stubborn, even after successfully scalding a chicken (more and that later).
So let’s take a look at a few of the feathers you’ll encounter as you begin defeathering your own chickens.
SUGGESTED READ:The Miracle of Chickens’ Feathers
Large Feathers
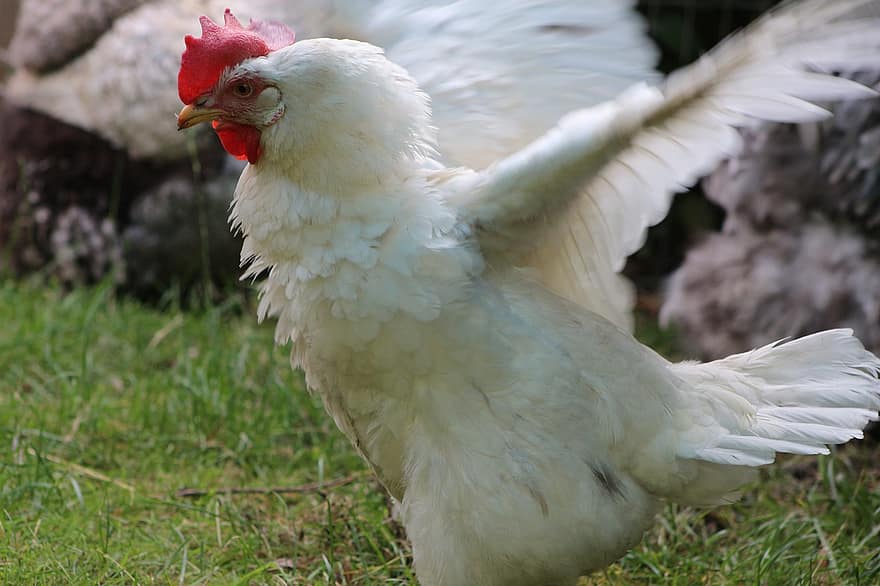
Large feathers make up a chicken’s wings and body and give a chicken its color.
The different forms of large feathers are:
- Primary feathers
- Contours
- Secondary feathers
- Tailfeathers
- Wing feathers
- and Flight feathers
These are typically removed just by scalding a chicken.
Small Feathers
On the other end of the spectrum, there are small, wispy feathers called Down, Semiplume, Filoplume, and Bristles (around the eyes).
These are the feathers that are both difficult to see and remove.
For example, when using an automatic plucker, the rubber fingers can grasp the large feathers easier than the smaller (young) feathers.
In most cases, you’ll just have to pluck the remaining feathers out by hand or with a special tool.
Pin Feathers
Pin feathers are one of the most challenging obstacles to maneuver while you’re defeathering a chicken.
They’re feathers that are in the process of growing, which means they’re short and shaft-like, making them difficult to pull out by hand.
In fact, even an automatic plucker can’t catch many of these tiny developing feathers.
但别担心;there are tools for that as well.
Why Scalding is Important to Defeather a Chicken
If you’ve ever picked up a stray feather and observed it, you’ve probably noticed the center of the feather; a hollow tube called thequill or shaft.
This is the part of the feather that joins the feather to the skin of the chicken.
Scalding a chicken helps loosen (or open) the skin around the shaft of the feather, which in turn makes it easier to pluck out.
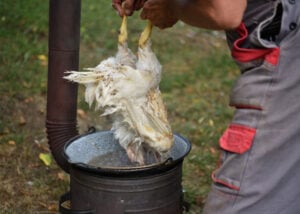
Scalding is the process of dipping a chicken carcass into a vat of hot water in order to loosen the feathers from the skin, making plucking easier.
Without the heat of a scalder, pulling out feathers would be challenging and would most likely cause the skin of the bird to tear.
Scalding can be done with hot water or steam.
If you’re opting to use hot water, the temperature of the water should be between 130 and 170 degrees Fahrenheit.
There isn’t a hard-and-fast rule regarding perfect temperature, so this might take some trial and error on your part as you get started with your scalding methods.
Also, there’s another variable to consider when it comes to processing your birds — different breeds have different feather densities and different kinds of feathers.
Take the Silkie chicken, for example.
Their feathers are extremely fine, and removing them may be a different experience than a Cornish Cross broiler with sparse feathering.
Three Ways How to Defeather a Chicken
Whilescalding is an important part of the processin the first two methods I’ll mention, the third is an alternative way to defeather a chicken without a scalder.
Method #1: The Scalding and Plucking Machine Method
You can buy a scalder made specifically for scalding chickens, or you can use your own pots, stovetop, or gas burners.
Either way, it’s important to maintain the right temperature (130-170 degrees Fahrenheit), so make sure you have a thermometer on hand if your scalder does not have one built into it.
A chicken that has not been scalded correctly will be difficult to pluck, so it’s important to get this step right.
Step One: Scald The Chicken
In this first method, you’ll simply dip the chicken carcass into the hot water and count to 30 seconds.
You can hold the chicken by the legs and slowly swirl it around in the water.
In some situations, the chicken will need to be scalded for longer…just make sure that you’re not cooking the chicken in the scalder.
You can pull the chicken up at about 30 seconds and test a small area by attempting to pull out some large feathers.
If they come out easily, then it’s time for the next step.
If they don’t budge, put the chicken back into the water and check the temperature of your scalder.
Step Two: Use an Automatic Plucker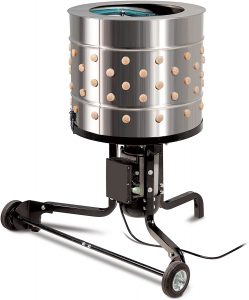

The easiest and least labor-intensive way to complete the plucking process is to utilize a large, automatic plucker.
Automatic pluckersare large drums lined with rubber fingers that spin and “grab” the loosened feathers while disposing of them through the bottom of the drum with rushing water.
With an auto-plucker, simply place the chicken into the drum, and wait until the majority of the feathers have been pulled out by the rubber fingers inside.
Most pluckers do a great job of removing feathers if the scalding is done correctly.
In most cases, however, there will be a few pin feathers and other stragglers left to remove by hand.
You can simply remove the leftover, stubborn pin feathers by gently squeezing them out, or you can use a pinning knife to do so.
Method #2: Scalding and Hand Plucking
Since automatic pluckers tend to be a bit pricey upfront, you may opt to hand-pluck your chickens by pulling out the feathers by hand and finishing the process with apinning knife.
This process can take a while and will certainly require some patience, but here’s how it works:
Step One:Scald the bird; the same as you would if you were using an automatic plucker
Step Two:Gently hold the chicken upside down by the legs.
Step Three:Begin gently removing feathers, starting with the wings and moving inward.
When you pull feathers, try not to grab too many at once because you could tear the skin.
And here’s an extra tip:pull feathers downward rather than up for a smoother, cleaner plucking.
Method #3:Skinning Over Plucking
If you don’t want to be bothered with plucking feathers and are completely happy with skinless chicken, you can opt to forgo the messy defeathering process and the scalding and simply remove the skin and feathers completely from the carcass.
This process is an easy fix if you don’t have the equipment or the time to pluck a flock of chickens (or if you have one that needs to be culled at a moment’s notice).
Step One:Position the chicken in a way that is easy for you to handle. Some people prefer to hang it, while others are comfortable working on a table.
Step Two:Begin by cutting a slit in the skin on the neck and pulling the skin downward. In most cases, the skin is quite easy to remove. With that being said, some areas are a bit more challenging, like the wings and the back.
Step Three:For difficult areas, use a sharp knife to cut the membrane from the meat while pulling gently on the skin.
As you remove the skin, you’ll work down and around, ending on the back of the chicken.
When you do get to the wings, you can either take your time to remove the skin and feathers or forgo the wings altogether.
This might be the option you chose if you’re simply saving the meatier parts of the chicken, like the breast, for example.
After you’ve removed the skin, you’ll find that there are small feathers stuck to it, not in it, so you’ll need to wash the chicken before storing it.
And speaking of storage, without skin, the chicken meat is more susceptible to frostbite directly on the muscle, so you’ll want to be sure you’re storing it tightly or consuming it quickly.
How to Defeather a Chicken: Before You Go…
Now that you have a pretty good idea of how to defeather a chicken, your next and final step is to finish processing the chicken as you’d like.
Wings? Chicken Breasts? Whole fryers? It’s up to you!
If you’re interested to learn more about chicken processing, check out our recommended reads below!